I have a problem.
Saturday night rolls around, and I get a serious itch.
It's an itch that says "you really really need to make a dress for one of your girls for church tomorrow."
Most weeks I can push it back and ignore it. I wash and fold my whole family's laundry--six of us, it keeps me busy. And really, it's a must: If we can't all wear new clothes, we should at least wear clean clothes.
But some Saturdays my hubby takes over the folding (bless his beautiful heart).
So, on those Saturday nights, after the kids are bathed and tucked in bed, I get to sew.
One of my favorite crafting/sewing blogs is Craftiness is not Optional. Just by looking at all the amazing dresses she whips up, I'm gonna bet that Jess gets a similar itch.
What I love about her blog is that she posts tutorials that are clear and so easy to follow. It's great for an inexperienced seamstress like me. A lot of my sewing is on a "trial and error" basis because I don't have much patience for the exactness that a printed pattern requires. She takes the fear out of sewing.
I have another problem.
I love bed sheets. I scour thrift stores for fun prints and patterns. I usually pay about $2.00 per sheet. Do you realize how many yards of fabric that is and how little I'm paying per yard? Don't answer that; I'm not good with the math skills so I wouldn't be able to check your answers anyway.
But know this: It's a great deal!!!
Here's some math I can do.
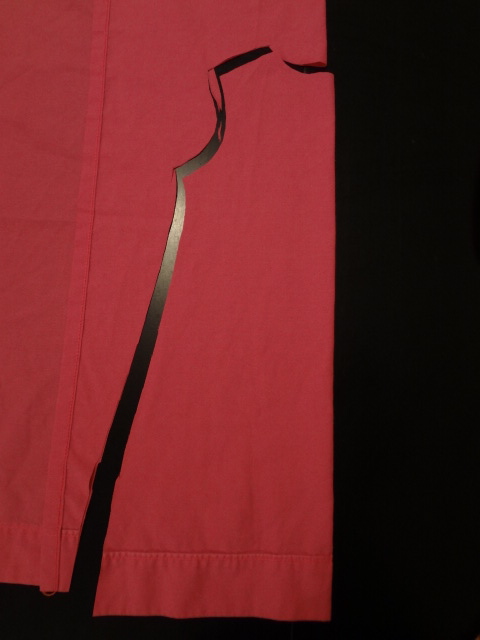
Itch + Craftiness Is Not Optional + a salvaged pink sheet =

(Inspired by Jess's Anthro Knock Off)
You can follow her tutorial (which skips around to some of her other tutorials for different techniques) but I thought I'd add a few tips and thoughts from my own experience.
When I use sheets I like to take advantage of the finished hems, so I made sure to use the nice wide top hem as the bottom of the dress. It takes a lot of the stress out of getting the perfect hem.
I used to think that doing sleeves was a big mystery I would never solve until I gained enough experience by making a million articles of clothing. Nope, Jess shows how to do it. So easy. I made sleeves on my first try!


I have a fear of buttons. Just kidding, I like them.
I just have a fear of trying to wrap my brain around the mechanics of adding a perfect row of buttons (that will actually match the button holes on the other side). Jess showed me that I can do buttons in an easy, cute way. This is kind of a signature technique that she likes to use on her creations.

When it comes to bias tape, most people probably don't have a bias tape maker. I don't and I can't just run out on a Saturday night to grab one (because at this point, it's probably midnight). You can see on her blog a great way to cut the fabric for the bias tape.
Once it's cut and sewn together, fold it in half lengthwise and iron all the way across the strip, adjusting as you go to be sure that the edges are even.
~The top strip is open, bottom strip shows it folded and ironed in half.~

Once the first fold is ironed and slightly cooled, open up the strip again. Take the bottom half and fold it up until it just about reaches the fold. Iron the new bottom fold, but try not to iron over the middle fold (you don't want to lose the crease).

Then fold down the top half so it meets near the center crease. Again, iron across, adjusting to be sure that the edges line up evenly.

And now you have bias tape.

When I made the pleats for the front neckline, I found the middle and added a slight crease, and then used a ruler and pins to mark each inch until I had gone three inches in both directions.

To make the pleats, I took the yellow pins and pulled them toward the center crease, folding at the half inch position (so the two yellow pins met in the middle). I pinned them into place. Then I brought the blue in from the right and the pink from the left and met them up with the yellows. Again, with the left blue and the right white.

I ended up adding one more pin and pleat on each side to make sure that the front piece of the dress layed flat on the bottom piece.

As I worked along and got the pleats and the sleeves made and the bias tape sewn on I realized it was going on 2 o'clock in the morning. Rather than worry about making a perfect little elastic casing sew into the back and sides of the dress, I decided to just throw together a quick elastic belt. It needed some embellishment so I grabbed a few things and made an eyelet lace flower with a clip.

I took an 18 inch length of lace and with a needle and thread, ran a stitch across the bottom.

As I stitched it, I pulled to gather the lace.

As I did so, it started to spiral. I adjusted as necessary and used the thread and needle to secure the spiral just the way I wanted it.

I needed a center for the flower.
Now, I've said it earlier, I like buttons, and a button would have made a cute center, but this time I wanted something a little more sophisticated.
I have a kit for covering buttons but I wanted to save it for another project so I decided to experiment and came up with a great solution.
I took a button that had a rounded back side. I cut a small circle of fabric just a little bigger than the button. I then cut a bigger circle.

I put the small circle onto the center of the big circle and then placed the button, rounded side down, into the center of them both. The small circle was there to add a layer so the button holes wouldn't show through.

I took the hot glue gun and added a dot of glue to one edge of the button and carefully pulled the fabric up over the side of the button. I put another dot of glue across the button....

...and pulled the fabric over and pressed in place.

I repeated on the other two sides and then just dabbed a bit of glue here and there and tucked the little fabric until the edges of the button were smooth.
It's definitely not pretty on the back...

...but the front's not too bad.

I made another flower for the hair but used a slightly different technique.

And here she is in her new Sunday dress.

Thanks Jess for the great tutorial.
Today I'm linking up to Crafty Cousins


LOVE!! I love this! Super cute! I love that little girlie, too! :)
ReplyDeleteI'm with you on the sheets. I just bought two Queen sized sheet sets @ Wal.Mart for less than $5 a set. One of them was a jersey knit, and the other was a fun print. Anyway, I made a sweet dolman style shirt for moi. It turned out really cute, and I even took pictures for a tutorial. Then Firecracker deleted all the pics on my camera. Grrr... No worries. I only had ELEVEN tutorials on the camera. I guess that's my fault for leaving the camera where a four year old could reach it. Live and learn.
I might have to do a new series called "The tutorials that might have been..."
P.S. Thanks for linking up!
P.P.S. Do I get an award for the longest comment EVER?!
P.P.P.S.? Is it P.P.P.S. or P.P.S.S.?
P.P.P.S.S.S. or whatever it is--LOVE YOU!! :)
...bought more sheets yesterday...
ReplyDelete...thought if you when I did...