Saturday, October 20, 2012

Busy, busy, busy!

 I've had a lot going on lately and haven't had time to take pictures of every project I've been working on but I'll share a few....

I recently made some matching skirts for a lady in my comunity.  They were red and they were high waisted with big red ties in the front.  They were so cute!  I wanted to make something similar for my little ladies.  I was shopping for fabric and was stopped in my tracks when came upon this adorable gray and white chevron at Hobby Lobby.  I took what was left on the bolt (7/8 of a yard).  Would you believe it if I told you that I whipped up these skirts (plus matching flower pins) on a Saturday evening and was actually in bed by 2:00 am.  Go me!


Too bad I didn't have enough fabric to make the big ties, but with beautiful faces like those, who needs more adornment, right?
Another super simple skirt I made for a friend's daughter.  She is going to be an angel for Halloween and needed a white skirt.   They are so easy to make:  a top casing for elastic and a bottom hem.

My in-laws are in town.  Goodness, I love them!!!  I've hardly touched a dirty dish, changed a diaper, or gotten up early enough to feed my kids breakfast.  They are on top of everything!  My father-in-law get's a little antsy when he doesn't have anything to do so I found a woodworking project and set him to work.  It's not finished yet so I'll update later.  I'm so excited!


My adorable son turned 7 the other day.  We've been having fun with his new presents (big time favorites were Hexbugs and Bey Blades)!  He requested a hot lava volcano cake!  All the kids were in awe of my fabulous cake decorating skills.  ha ha (I am not a professional and will NEVER claim to be).

My husband's coworker is having her first baby--a boy.  My go to shower gift is a set of my favorite handmade baby bibs!  


I added little "scraplique" robots to the front of two bibs to make a matching set.


I'm off to spend the last few days with my in-laws and then I'll be back with a few more projects and maybe a tutorial or two.

I'm linking up with

Sunday, September 16, 2012

Modest is Hottest: Making a Strapless Dress Modest

My friend was recently looking for a modest formal gown for the Air Force Ball that she and her husband would soon be attending.  A mutual friend was a bridesmaid in a wedding not too long ago and was willing to rent the beautiful dress to my first friend.  The problem was that the dress was strapless.  The good news was that the dress came with a matching wrap.


But, wrapped around her shoulders, the wrap didn't cover as much as my friend had hoped.  We considered making a bolero type jacket to be worn over the dress but it would cover up the beautiful embroidery and beading on the bodice.


  We then played around with tucking and decided to stitch the wrap to the dress in the strategic places.  However, after a good nights sleep, I just didn't like the idea.  I felt that something needed to be done to make the dress more modest in a permanant way that both women (who were built slightly differently) could comfortably wear the dress without added alterations between uses.

So, with the blessing of the dress owner, I set about to find a way to stragetically cut up the wrap and come up with a modest dress.  I was very nervous about it, though, because I mostly play it safe and sew on cottons only!

The idea of the bolero jacket came back to me, but instead of a jacket worn over the dress, I wanted to make something to fit under the dress.  I decided that the jacket should have a very deep v-neck that tied in the front and under the bust.

I had approximately 2.5 yards of length but only about 20 inches in width.  I put a lot of thought into it and even prayed for inspiration on what I could do to make this work (without completely ruining the wrap because I only had ONE CHANCE to get it right-- again, I am a sewer of cottons!).


Have I told you that I love sheets?

I realized that with a sheet, I could have as many chances that I needed until I could get it right!

I took an old sheet and cut it to the exact size of the wrap.  That helped me visualize how much fabric I could use.

I then found a v-neck shirt that I knew would fit both friends.   


  I folded it in half and traced a basic shape of the shirt onto some tissue paper, adding long strips to the inside sides to make the ties.  I cut 4 pieces (two front and two back pieces).


I took the armscye and traced a sleeve pattern, then cut 2 sleeves.

I placed each front piece with a back piece and stitched across the tops of each shoulder.


I hemmed the bottom of each sleeve and prepared them for a small gather by running a stitch from one end of the arched side to the other.  I pulled the threads to create a gather and moved the gathers toward the center of the arches.


I pressed open the shoulder seams.... 


... and pinned the center of the sleeve arch to the shoulder seams.


After pinning the center I went to the ends and pinned my way back to the center pin, pushing the gathers toward the center.  Once I had the sleeves pinned on I sewed them on.


I was so glad at this point that I had second chances with this project.  I realized that I had pinned and sewed the sleeves on wrong.  If you go back up and look at the picture where I ran the gathering stitch through the sleeves, you'll see that I squared off the fabric at the base of the arches.  I should have rounded it a little more because when I pinned, I started there, instead of pinning across the top of that piece.  I thought I could just get away with trimming the extra little fabric off but it really makes a difference and looked bad.

I went ahead and sewed the side seams so I could at least try the jacket on my friend to see if I was close to getting a good fit.

We tried the jacket on her with the dress only to realize that the v-neck in the back wasn't going to work.  So, I took note-- do the sleeves right, make a regular rounded back neckline and I also discovered that I made the shoulders way too wide.

Making the adjustments noted above, I cut all new pattern pieces (not wanting to change anything about the originals, just in case I needed to fall back on them).  I whipped up another sheet jacket and after checking it with the dress, I took a deep breath, said a prayer and started cutting into the wrap.

I won't give you a whole new tutorial but I wanted to add a lining to the front pieces so I'll share how that was done.

I cut out two identical pieces of the front bodice parts out of black.  I just used a cotton from the remnant bin (cotton is safe :).  I sewed the pieces along the inside neck with the right sides together.


I snipped along the curves to help minimize bunching.... 


...Pressed the seams open, then flipped them right sides out.


Then I pressed again and topstitched.


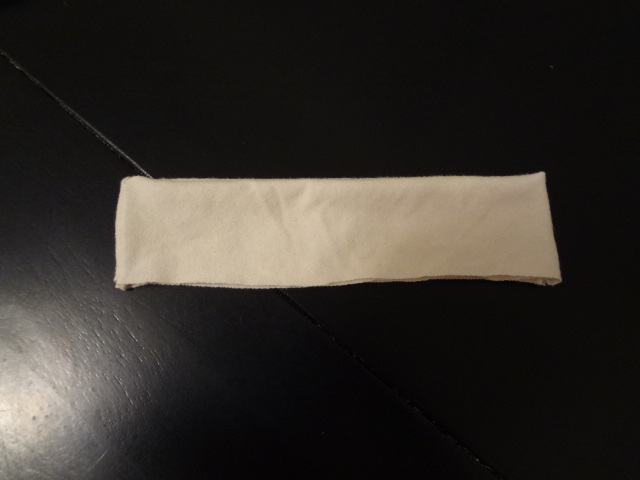
I didn't want to mess with lining the entire back piece so I just made a small lining.  I placed the back bodice over the lining fabric and cut a matching arch.  I removed the satin and and cut a parallel arch about two inches wide. 

I ironed on some fusible webbing to the back piece and zig zagged the raw edges.  Again, with right sides facing (right side of facing and the lining side), I sewed the back lining to the back bodice piece.  I pressed the seam open then flipped the lining to the inside of the bodice piece.


I pinned the shoulder seams and the back lining in place.

 I sewed the shoulder seams (zig-zagging after) then did a top stitch on the lining piece.

I moved on and did the sleeves (correctly!) and finished the hemming for the bottom of the jacket.


I made sure to zig-zag all the raw edges.

And I zig-zagged the ends of the ties.

Ahh, sweet relief!  It was finished!!!

 The knot fits under the bust, nestled between the "girls" so there were no funny lumps. :D


 So happy together!
 (I didn't tell you, but he returned from deployment a week before the ball.)

  Aww, how sweet!

 Ooh, and with all the careful planning, I had enough fabric left over to make a big flower for her hair.

This was a great project for me.  I was happy to help solve a problem and I gained a lot of experience and confidence in the process.

And guess what!  The second friend might be wearing a beautiful, modest plum dress to the upcoming Navy Ball.  And if she doesn't, I just might. 

I'm linking up with the Crafty Cousins!


Thursday, June 7, 2012

Below the Belt--pants, shorts, skirt!

So, it all started with a pair of pants.
My friend needed some shorts for her summer vacation so she asked me to help her change a pair of pants into shorts.  Done in a quick 20 minutes!

I was left with scraps from the legs that I just couldn't throw out (I blame my frugality on my mom).  


 I loved the top stitching on the inseam and that it was a nice stretch denim so I decided to use the scraps to make a skirt for my daughter.


I used my seam ripper and ripped out the outer seams.


With the fabric right sides together, I lined up the top stitching seams and cut out a very slight A-line shape....  I know my daughter's waist measurement is 20 inches so I added an inch (for a 1/2 inch seam allowance on both sides) and then divided 21 inches by 2, getting 10.5 inches.

I wanted the top stitching to be centered on the front of the skirt so I measured 5 1/4 inches out from the center of the top stitching in both ways.  I marked each measurement with pins.  Make sense?  So the total measurement across the top of the skirt would be 10.5 inches, with the top stitch centered.  

So, that's the top of the A-line.  For the bottom, I just added another two inches to the original waist measurement.  So, 22 inches divided by 2 equals 11 inches across the bottom (again, I divided that by 2 and measured out 5.5 inches from the center of the top stitching to the edges).

Sounds complicated.  :(
Basically, the total waist measurement (plus the seam allowance) will be divided evenly between the front and the back pieces.


Anyway, if you're still with me, once everything was marked with pins I cut the fabric and sewed up each side seam then zig-zagged to finish the seams.

I wanted to make a stretchy waistband for the top of the skirt so I took an old knit t-shirt and cut up the sleeve, making sure the waistband piece was an inch shorter in length than the skirt top (19 inches).  I wanted it to stretch to fit when pulling up the skirt but then I wanted it to fit snugly around her waist. 


This is how the sleeve looked once I cut it.  I would say that it was probably about 4 inches tall, by 9.5 inches long (again, two layers for the front and the back pieces equaling 19 inches-and I didn't worry so much about a seam allowance this time because I knew the knit would stretch). 


 I zig-zagged up each side.  I didn't use a straight stitch because I was working with a knit and didn't want the stitches to break as the fabric stretched.


 I folded the fabric from the top down all around the loop.  You'll know you did it correctly if you  have a top fold and an unfinished bottom edge.


Next, I pinned the waistband onto the skirt.  The skirt was right side out and the folded side of the waistband was pointed down while the unfinished edge was up.  I pinned and stretched the knit to fit around the skirt.  I also tried to match up the side seams of the skirt with the side seams of the waistband.


I wanted a tag so once it was all pinned securely, I took a two inch piece of ribbon, folded it in half and stuck it into the back of the waistband so that it was tucked into the two layers of the waistband (if it's stuck between the waistband and the skirt, it will show).


I then used the zig-zag stitch to sew all the layers together, again, stretching the knit to fit the skirt.  I think I went around twice for extra security. 


I opened the top up.... 


 ...and making sure to push all the layers of the seam down into the stitch path, I sewed a top stitch.

(all the layers stitched into the top stitch)


 I wanted to try to mimic the original thick top stitching on the pant legs so I put two spools of grey onto my sewing machine.

  I folded up the hem and stitched. 


 I had some grey threads that I saved from another project so I tied them together into a bow and stitched in securely to the front of the skirt.


And here it is finished! 


(The look of a four year old who would rather be playing with the neighborhood kids than getting her picture taken.)

I'm linking up to Crafty Cousins: