Monday, May 21, 2012

Oh, What a Beautiful Mess!

I got together with three of my neighbors and we had a wreath crafting day.  We had so much fun laughing and crafting that I didn't take any other pictures of our progress...  I love my wreath and have plenty of extra materials so I'm going to make another one.  I'll take pictures and put up a tutorial soon...  

Mother's Day and End of Year Teacher Gift idea

 With eight children and over 100 grandchildren and great grandchildren (plus one great great), my mother often gently mentions that she doesn't need "stuff" from us for the holidays.  Usually we order flowers for her and my mother-in-law.  This year we were a little tight in the budget department so I came up with a way to still send flowers but with a more personal touch...and we saved tons of money!

I took some bamboo skewers and painted them green.  I  used a Sharpie marker but any craft paint would work well.  I also took some 12x12 scrapbook paper and cut them into strips 1 1/2 inches wide by 12 inches long.


I had each child write a special message to grandma.


 (I had to translate for the baby)


 I took a piece of tape and taped the end of the strips to the tops of each bamboo skewer.


 Then I started rolling up, nice and tight.


Once it's rolled and you let go, it will loosen up but will hold it's shape. 


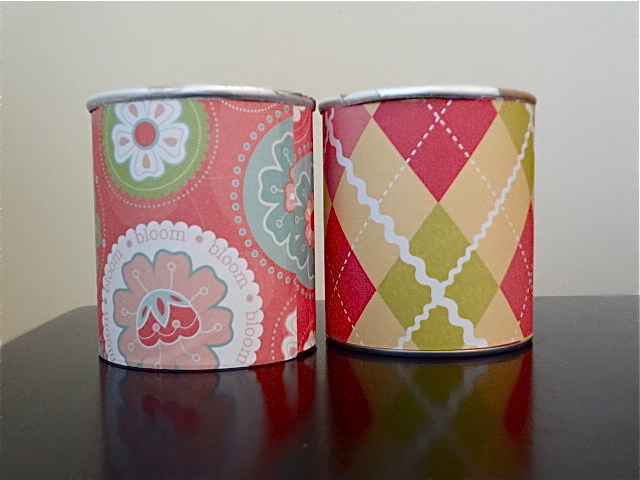
 I took two short Pringles cans and covered them with paper... just taped it on.


I took the lids and used my eyelet punch and a hammer to punch holes in the top.  I tried to be lazy and not use the punch, instead cutting little Xs (like the straw hole in a soda lid), but it caused the skewers to tip more than I wanted.  However, if you were to put candy in the can, then that would probably help stabalize the skewers.  Once the holes are made, put the lid on the can and stick the skewers into the can.  I took a few skewers out and cut them shorter so that they weren't all the same length.  I added green paper leaves just by folding and cutting leaf shapes then gluing them onto the skewers.


I packed the flowers into shoe boxes and surrounded them with tissue paper and mailed them off, just in time for Mother's Day.

We made another one for my son's kindergarten teacher.  He wrote some of his favorite memories from the year.  We added some chocolate candy to the can for an extra special treat.


Not too long after sending them, I got a phone call from my mom.  She was crying and my heart stopped because I thought she was calling with bad news from home.  Gratefully, they were tears of joy.  She LOVED the flowers!

Saturday, April 28, 2012

Roses, Roses, Roses

Last year I was running into K-mart and stopped to take a look at the sidewalk clearance racks.  I found these two pink v-neck t-shirts for $2 each.  It took me a while to figure out what I wanted to do with them, but I am so glad I took my time because I LOVE the end result--definitely worth the wait!

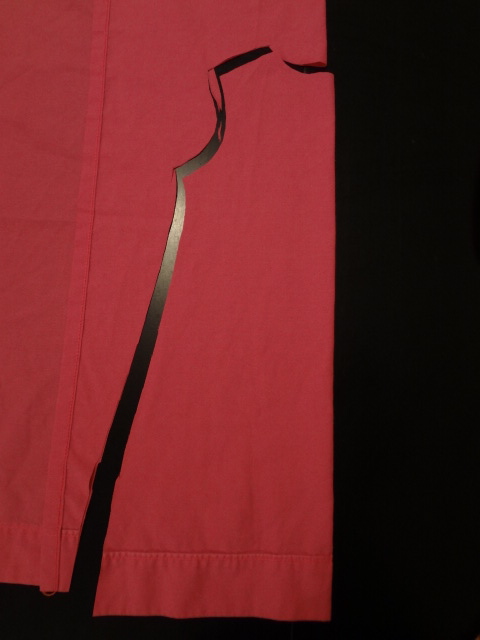
I took one of the shirts and cut the sleeves off. 


Then, following the curve of the sleeve,  I cut strips approximately 1/2 inch wide.


I only cut the strips from one sleeve because I wanted to use the other sleeve for a few circles.

Remember how I like to make circles?  Cut a square, trim the corners then trim around a little more to make a circle.  I cut three circles.

For the next step, I took a circle and a strip of the sleeve fabric.  Put an end of the strip onto the center of the circle and stitched a few stitches (backstitch).  Then, with the needle down, lift the pressure foot and turn the circle about 1/16 of a turn and gently pull the strip to the side and stitch.  Repeat, repeat, repeat.  What?!  That was hard to follow?  Ok, I figured it would be so I made a video tutorial.  Sometimes it is so much easier to just see it done. :)  It's a little long, but you'll get the idea within the first few minutes.  The whole of the video offers advise and tips on making it an easy going project and how to keep going once the first strip ends.


At the end of the video, we are left with this flower.  See, the top right edge of the base circle shows.  It doesn't look too bad, but I felt like there was a little too much there....

So I simply just trimmed it off.


I made three circles (the top circle was the first I made and I pulled the strip fabric as I sewed-- I think it was cute but I really love the more ruffly look of the bottom two, so, don't pull too much!).  I placed the flowers on the shirt where I wanted them.


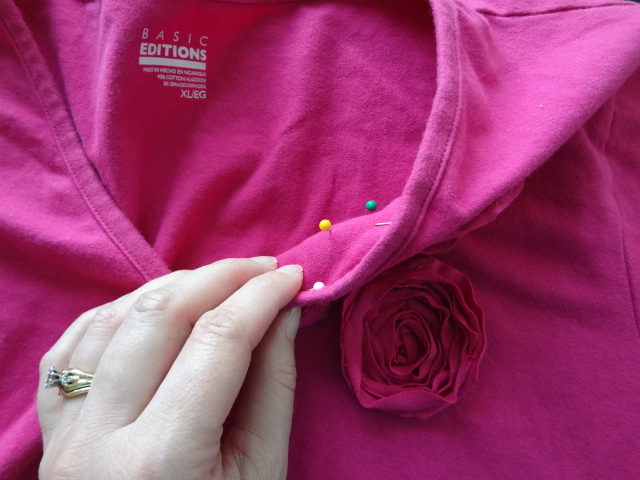
I pinned them in place on the inside of the shirt.  I then carefully turned the shirt inside-out.


I tacked each flower onto the shirt using approximately 6 stitches around the perimeter and one in the center of each flower.  I didn't want any loose threads so I ran the needle between the layers when going from stitch to stitch, and for extra security I made a knot after each tacking stitch.


I love the way my shirt it turned out.


Oh, and for those who may not have a use for roses in their life, if made in a different color or variety of colors, these would make fun monster parts or planets.  Use your imagination. :)

Thanks for stopping by.
I'm linking up to CRAFTY COUSINS!

Saturday, April 21, 2012

Flippin' Fast Flower Tutorial

In my last post I mentioned that I made flowers for the girls' hair to match their Easter dresses.  I threw together a tutorial and it was so fast that I got it all done in less than 10 minutes (including pictures).

Get ready.

Get set.

Go...!

You will need to cut five circles out of your choice of fabric.  The circles need to graduate in size from largest (about 3-inches diameter) to smallest (1-inch diameter).  The beauty of this flower is that it doesn't have to be perfect.

An easy way to cut circles freehand is to first cut a square.  Then cut the four corners off like this:


Once the corners are cut off, it's easy to just trim around the rest of the edges to make a circle:


Moving along.... Five circles (notice the A-OK imperfect shapes), needle & thread and a little white button.


Now, to add a little visual interest to the flower, I like to *flip* the second and fouth circles over, revealing the wrong side of the fabric.


Now, stack those little circles from largest to smallest and top it off with a cute little button.


And sew that button on.


I also like to grab the edges of the circles to fray them a bit.


Last step, attach the flower to your favorite hair clip using your favorite method and you're good to go!

That's it!
Flippin' fast, right?!

I'm linking up to Crafty Cousins What I Wore Sunday linky party!


Saturday, April 14, 2012

Lulu Dress by CINO

I picked up some cute fabrics a few months ago with the hope of making skirts for my girls.  When Easter Eve rolled around (a Saturday, by the way), the skirts didn't feel like the right project.  With it being a Saturday and me needing something for the girls for Easter, I, once again, ran to my favorite place for little girl dress tutorials:  http://www.craftinessisnotoptional.com/

I searched Jess's Tutorial page and found the Lulu Dress.  I used all woven cottons on mine so I switched things up a bit.  Because the cotton wouldn't stretch like the knit, I made the button closure on the backs of the dresses.

 What are they peeking at?

 Sugar, sugar sugar!

Rather than doing the elastic ruched sleeves, I just made simple little cap sleeves.  I made some little flowers for their hair but didn't get any pictures.  I might have to share them next week....


I think the pink dress was a perfect fit.  The aqua dress turned out a little short in the bodice.  She may not get much use out of it before it's too small but the good news for her is that she'll grow into the pink one.

For those keeping track, I finished at 5:00 a.m. Easter morning.  I really have to stop doing that!!!

UPDATE: Go here for the Flippin' Fast Flower Tutorial!

I'm linking up to Crafty Cousins!

Sunday, April 8, 2012

Little Dresses for Africa

This week I needed a fairly easy project so I decided to make some pillowcase dresses for Little Dresses for Africa.  I have been wanting to make a pillowcase dress for years and finally felt a prompting to do it now.


My hope was to make 3 or 4 dresses so I went to the fabric store looking for a good deal on some 100% cotton fabric that was sturdy and cute.  My friend found this fun yellow fabric with the pink flowers and green dots.  It was marked at just under $2.00 a yard but when it was cut, the price came up as $0.67 a yard.  With the two yards that were on the bolt, I made a small toddler size dress and an extra-large for a teenage girl.


I used some scraps from a yellow sheet to add pockets.  I'm going to slip a new pair of underwear in each pocket to send along with the dresses.  For these precious little girls, wearing underwear can make a big difference in their lives.

This is my little one, cheesing it up for the camera!

I'm linking up to Crafty Cousins!

Saturday, March 31, 2012

She Sews on Sheets

I have a problem.

Saturday night rolls around, and I get a serious itch.

It's an itch that says "you really really need to make a dress for one of your girls for church tomorrow."

Most weeks I can push it back and ignore it.  I wash and fold my whole family's laundry--six of us, it keeps me busy.  And really, it's a must: If we can't all wear new clothes, we should at least wear clean clothes.

But some Saturdays my hubby takes over the folding (bless his beautiful heart).

So, on those Saturday nights, after the kids are bathed and tucked in bed, I get to sew.

One of my favorite crafting/sewing blogs is Craftiness is not Optional.  Just by looking at all the amazing dresses she whips up, I'm gonna bet that Jess gets a similar itch.

  What I love about her blog is that she posts tutorials that are clear and so easy to follow.  It's great for an inexperienced seamstress like me.  A lot of my sewing is on a "trial and error" basis because I don't have much patience for the exactness that a printed pattern requires.  She takes the fear out of sewing.

I have another problem.

I love bed sheets.  I scour thrift stores for fun prints and patterns.  I usually pay about $2.00 per sheet.  Do you realize how many yards of fabric that is and how little I'm paying per yard?  Don't answer that; I'm not good with the math skills so I wouldn't be able to check your answers anyway.

But know this:  It's a great deal!!!

Here's some math I can do.

Itch + Craftiness Is Not Optional + a salvaged pink sheet =


(Inspired by Jess's Anthro Knock Off)

You can follow her tutorial (which skips around to some of her other tutorials for different techniques) but I thought I'd add a few tips and thoughts from my own experience.

When I use sheets I like to take advantage of the finished hems, so I made sure to use the nice wide top hem as the bottom of the dress.  It takes a lot of the stress out of getting the perfect hem.


I used to think that doing sleeves was a big mystery I would never solve until I gained enough experience by making a million articles of clothing.  Nope, Jess shows how to do it.  So easy.  I made sleeves on my first try!


 I have a fear of buttons.  Just kidding, I like them.
I just have a fear of trying to wrap my brain around the mechanics of adding a perfect row of buttons (that will actually match the button holes on the other side).  Jess showed me that I can do buttons in an easy, cute way.  This is kind of a signature technique that she likes to use on her creations.  


When it comes to bias tape, most people probably don't have a bias tape maker.  I don't and I can't just run out on a Saturday night to grab one (because at this point, it's probably midnight).  You can see on her blog a great way to cut the fabric for the bias tape.

Once it's cut and sewn together, fold it in half lengthwise and iron all the way across the strip, adjusting as you go to be sure that the edges are even.
~The top strip is open, bottom strip shows it folded and ironed in half.~ 


 Once the first fold is ironed and slightly cooled, open up the strip again.  Take the bottom half and fold it up until it just about reaches the fold.  Iron the new bottom fold, but try not to iron over the middle fold (you don't want to lose the crease).


Then fold down the top half so it meets near the center crease. Again, iron across, adjusting to be sure that the edges line up evenly.


And now you have bias tape.


When I made the pleats for the front neckline, I found the middle and added a slight crease, and then used a ruler and pins to mark each inch until I had gone three inches in both directions.


To make the pleats, I took the yellow pins and pulled them toward the center crease, folding at the half inch position (so the two yellow pins met in the middle).  I pinned them into place.  Then I brought the blue in from the right and the pink from the left and met them up with the yellows.  Again, with the left blue and the right white.

I ended up adding one more pin and pleat on each side to make sure that the front piece of the dress layed flat on the bottom piece.


As I worked along and got the pleats and the sleeves made and the bias tape sewn on I realized it was going on 2 o'clock in the morning.  Rather than worry about making a perfect little elastic casing sew into the back and sides of the dress,  I decided to just throw together a quick elastic belt.  It needed some embellishment so I grabbed a few things and made an eyelet lace flower with a clip.   


I took an 18 inch length of lace and with a needle and thread, ran a stitch across the bottom. 


As I stitched it, I pulled to gather the lace.


As I did so, it started to spiral.  I adjusted as necessary and used the thread and needle to secure the spiral just the way I wanted it.


I needed a center for the flower.
Now, I've said it earlier, I like buttons, and a button would have made a cute center, but this time I wanted something a little more sophisticated.
I have a kit for covering buttons but I wanted to save it for another project so I decided to experiment and came up with a great solution.


I took a button that had a rounded back side.  I cut a small circle of fabric just a little bigger than the button.  I then cut a bigger circle.


I put the small circle onto the center of the big circle and then placed the button, rounded side down, into the center of them both.  The small circle was there to add a layer so the button holes wouldn't show through.


I took the hot glue gun and added a dot of glue to one edge of the button and carefully pulled the fabric up over the side of the button.  I put another dot of glue across the button....


...and pulled the fabric over and pressed in place.


I repeated on the other two sides and then just dabbed a bit of glue here and there and tucked the little fabric until the edges of the button were smooth.

It's definitely not pretty on the back...


...but the front's not too bad.


I made another flower for the hair but used a slightly different technique. 

 And here she is in her new Sunday dress.

Thanks Jess for the great tutorial.

Today I'm linking up to Crafty Cousins